How to Remove Moss From Your Roof
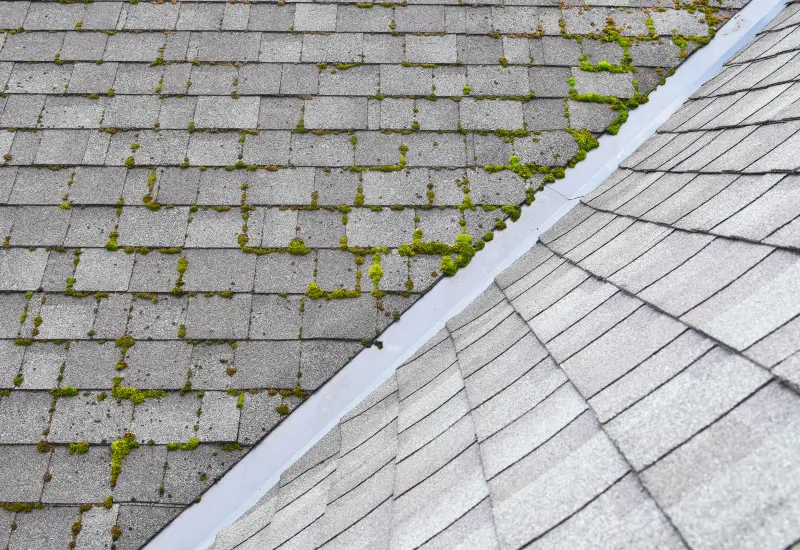
Moss might seem innocent, even charming, as it clings to your roof shingles, evoking storybook-like imagery. But don’t be fooled—this greenery can cause severe damage to your roof if left untreated. Moss traps moisture, leading to rot, loosening shingles, and costly repairs.
Homeowners need to know how to remove moss from a roof properly, safely, and effectively to protect their homes’ structural integrity and prevent expensive repairs down the line. Addressing moss promptly lengthens the lifespan of your roof and safeguards your investment in your property.
Why Is Moss on Your Roof a Problem?
Moss thrives in damp, shaded areas. Over time, it can do more than form a green carpet over your shingles; here’s what could happen if moss is left unchecked:
- Moisture Retention: Moss holds water like a sponge, causing shingles to deteriorate prematurely.
- Shingle Damage: Moss roots can work their way under shingles, lifting them and exposing your roof to leaks.
- Structural Risks: Prolonged moisture can seep into the roof deck and underlayment, causing rot and weakening your roof structure.
- Weakened Curb Appeal: Moss-covered roofs can make even the most beautiful home look unkempt.
Addressing moss buildup early can help you avoid these problems altogether.
Tools and Equipment You’ll Need
Before starting, gather the right tools and materials to tackle moss removal efficiently.
- Safety Gear: Harness, sturdy work boots, gloves, and safety goggles.
- Ladder: Use a stable, adequately positioned ladder for access.
- Low-pressure Hose: A garden hose with a sprayer attachment.
- Soft-bristle Brush: For manual moss removal. Avoid hard-bristled brushes, which can damage shingles.
- Moss Removal Solution: A commercial, roof-safe solution or a homemade one using 50/50 water and white vinegar.
- Trash Bags: These are for storing loose moss removed during the process.
Now, it’s time to jump into the process step by step.
Step-By-Step Guide to Removing Roof Moss
Step 1: Check Your Roof Condition
Before you begin, inspect your roof to assess its condition. Is there just a light layer of moss, or has it completely taken over? Additionally, ensure your shingles are intact. Loose shingles or general wear may require professional inspection.
If you find severe damage during your inspection, consider contacting a professional service like Homesouth Roofing’s Maintenance Experts for guidance.
Step 2: Set Up Your Workspace Safely
When working on your roof, safety must be your top priority.
- Always wear a safety harness securely anchored to a stable point.
- Work with a partner who can assist in case of an emergency.
- Position your ladder correctly, ensuring it’s on level ground and secured. Use a ladder stabilizer if needed.
Step 3: Spray Water to Loosen the Moss
Using a low-pressure garden hose, spray downward along the roof’s slope. This helps dislodge loose moss without damaging shingles.
Caution: Avoid using high-pressure washers, as they can erode the granules on your shingles and cause further damage.
Step 4: Manually Remove the Moss
With a soft-bristle brush, gently scrub the moss off the roof. Work in small sections, starting from the top of the roof and moving downward. Scrubbing too aggressively can scrape away the protective layer of the shingles.
Pro Tip: Collect the scraped-off moss in a trash bag to make cleanup easier and prevent it from spreading elsewhere in your yard.
Step 5: Apply a Moss Removal Solution
For persistent patches, apply a moss removal solution. Opt for a roof-safe commercial product to preserve both your shingles and the surrounding environment. Always follow the product instructions. For eco-friendly DIY solutions, mix equal parts water and white vinegar and use a sprayer to apply it to the affected areas.
After applying, allow the solution to sit for 10-15 minutes before gently rinsing it.
Step 6: Rinse and Inspect
Once the moss removal solution has worked, rinse the roof with a garden hose, ensuring all moss is removed. Avoid leaving chemical residues that could damage your roof or harm nearby plants.
Step 7: Call in the Experts If Needed
If moss has significantly damaged your roof or the growth is too extensive to handle on your own, consult a professional roofing service. Homesouth Roofing’s Team provides expert advice and assistance across Alabama and the Florida Panhandle to restore your roof to top condition.
Preventing Moss from Growing Back
The best way to deal with moss is to stop it before it starts. Incorporate these preventative measures into your routine maintenance plan to keep your roof moss-free:
- Trim Overhanging Branches: Sunlight helps dry your roof, making it less hospitable for moss.
- Clean Your Gutters: Clogged gutters can lead to water pooling, encouraging moss growth.
- Install Zinc or Copper Strips: These metals naturally deter moss when water flows over them. Consider installing strips along the roof ridge.
- Address Roof Maintenance Regularly: Routine professional maintenance can catch potential moss issues early.
Should You Do It Yourself or Hire a Professional?
While removing moss can be a DIY project, but it has risks. Working on a roof can be dangerous, and incorrect techniques could damage your shingles or compromise your roof’s integrity.
Experts like Homesouth Roofing offer cost-effective moss removal and preventive maintenance services for homeowners who prefer peace of mind and professional-grade results.
A Healthy Roof Is Just a Step Away
Removing moss from your roof preserves your roof’s lifespan, extends your home’s durability, and boosts curb appeal. By following these tips, you can proactively address moss issues and prevent them from returning.
If you need assistance or would rather leave the task to trusted professionals, contact the experts at Homesouth Roofing. Serving Alabama and the Florida Panhandle, our team is equipped to help you maintain a clean, moss-free roof.